
好きな時間から開始できるストップウォッチ | 作り方も紹介
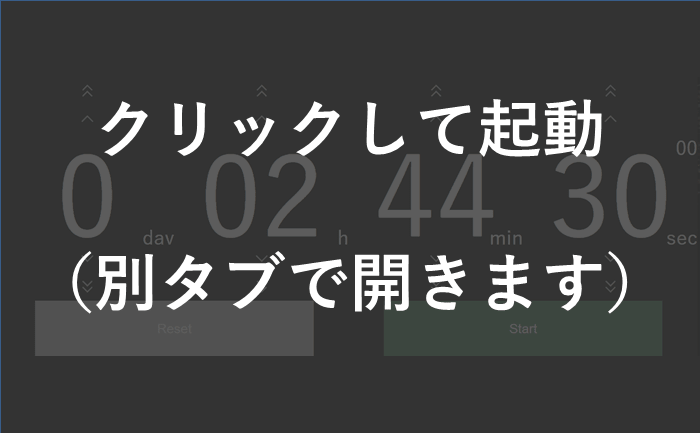
- ・ありそうで無かった、好きな時間から計り始めることが可能なストップウォッチ
- (例:15分経過した状態からスタート)
- ・PC/タブレット/スマホ対応、大きなボタン
- ・サイトロゴや広告無し
- ・1/100秒単位で計測、999日23時間59分59秒99まで
以下、作り方の紹介記事です。初心者の自分が引っかかったポイントなどを書きます。
1.HTMLでボタンを作る
【6、7行目】でJSとCSSを読み込んでいます。このHTMLをコピペして試しに動かしてみる際は、 JSには"stopwatch.js"、CSSには"stopwatch.css"と名前を付けて同じフォルダに保存してください。
【15行目ほか】最初はinputタグでボタンを作っていたのですが、iphoneで開くとボタンの形が変わってしまった。buttonタグにしたところ解決しました。一応、CSSの28と126行目でappearnce: none;も追加しました。
<!DOCTYPE html>
<html lang="ja">
<head>
<meta charset="UTF-8">
<meta name="viewport" content="width=device-width, initial-scale=1.0">
<script src="stopwatch.js"></script>
<link rel="stylesheet" href="stopwatch.css">
<meta name="robots" content="noindex">
<title>Stopwatch</title>
</head>

<body>
<form name="stopwatch">
	<div class="preset-container">
		<button type="button" class="add10" onclick="add10d()">
		<button type="button" class="add10" onclick="add10h()">
		<button type="button" class="add10" onclick="add10m()">
		<button type="button" class="add10" onclick="add10s()">
	</div>

	<div class="preset-container">
		<button type="button" class="add" onclick="add1d()">
		<button type="button" class="add" onclick="add1h()">
		<button type="button" class="add" onclick="add1m()">
		<button type="button" class="add" onclick="add1s()">
	</div>

	<div id="timeMS">
		<div class="small-display-time">00</div>
	</div>

	<div id="display-container">
		<div class="display-time" id="timeD">0</div>
		<div class="display-time" id="timeH">00</div>
		<div class="display-time" id="timeM">00</div>
		<div class="display-time" id="timeS">00</div>
	</div>

	<div id="units-container">
		<div class="display-unit">day</div>
		<div class="display-unit">h</div>
		<div class="display-unit">min</div>
		<div class="display-unit">sec</div>
	</div>

	<div class="preset-container">
		<button type="button" class="sub" onclick="sub1d()">
		<button type="button" class="sub" onclick="sub1h()">
		<button type="button" class="sub" onclick="sub1m()">
		<button type="button" class="sub" onclick="sub1s()">
	</div>

	<div class="preset-container">
		<button type="button" class="sub10" onclick="sub10d()">
		<button type="button" class="sub10" onclick="sub10h()">
		<button type="button" class="sub10" onclick="sub10m()">
		<button type="button" class="sub10" onclick="sub10s()">
	</div>

	<div class="start-container">
	<button type="button" id="resetBtn" onclick="resetTime()">Reset</button>
	<button type="button" id="stopwatchBtn" onclick="countUp()">Start</button>
	</div>
</form>
</body>
</html>
2.JavaScriptで動かす
【6行目】変数interbalを最初に宣言しないと動かないパターンがあったので、最初に宣言しました。 20行目で宣言と同時にsetInterval()を代入→22行目でclearInterval()で止めるという流れならOK。 でも一度もStartを押していない状態でResetボタンを押すと、変数intervalが無い状態で66行目に行くので動かなくなりました。
【16-19行目】document.getElementById("ID名")でHTML要素を取得し、JSで何か変更を加えるというのはできたのに、 document.getElementByClassName("クラス名")で複数の要素にまとめて変更加えようとするとできない!というのにハマりました。 複数だから配列で取得されるので、for文で1つずつ処理しないといけないようです。
let standBy = true;     //スタンバイ状態をtrue、計測中をfalseとする
let timeToAdd = 0;
let elapsedTime = 0;
let currentTime = 0;
let startTime = 0;
let interval;

function countUp() {
	if (standBy == true ) {     //スタンバイ状態にボタンを押した場合
	startTime = Date.now();
	standBy = false;
	document.stopwatch.stopwatchBtn.textContent = "Stop";
	document.stopwatch.stopwatchBtn.style.backgroundColor = "#A76B86";  //ピンク色
	//resetボタンとpresetボタンを隠す。presetボタンは配列で得られるためfor文が必要
	document.stopwatch.resetBtn.style.visibility="hidden";
	btnsToHidden = document.getElementsByClassName("preset-container");
	for (i = 0; i < btnsToHidden.length; i++) {
		btnsToHidden[i].style.visibility = "hidden";
	}
	interval = setInterval("timeUpdate()",10);  //10ミリ秒ごとに繰り返す
	} else {        //計測中にボタンを押した場合
	clearInterval(interval);    //繰り返しを止める
	timeToAdd = elapsedTime;
	standBy = true;
	document.stopwatch.stopwatchBtn.textContent = "Start";
	document.stopwatch.stopwatchBtn.style.backgroundColor = "#5E936E";  //緑色
	document.stopwatch.resetBtn.style.visibility="visible";
	}
}

function timeUpdate(){
	currentTime = Date.now();
	elapsedTime = currentTime - startTime + timeToAdd;
	displayUpdate();
}

function displayUpdate(){
	//1000日以上になったら停止する
	if (elapsedTime >= 1000*24*60*60*1000) {
		elapsedTime = 1000*24*60*60*1000 - 1;
		clearInterval(interval);
	}

	d = Math.floor(elapsedTime / (24*60*60*1000));
	h = Math.floor(elapsedTime % (24*60*60*1000) / (60*60*1000));
	m = Math.floor(elapsedTime % (60*60*1000) / (60*1000));
	s = Math.floor(elapsedTime % (60*1000) / 1000);
	ms = Math.floor(elapsedTime % 1000 /10); //ミリ秒は1番下の桁を切り捨てる

	//2桁で表示する
	h = ('0' + h).slice(-2);
	m = ('0' + m).slice(-2);
	s = ('0' + s).slice(-2);
	ms = ('0' + ms).slice(-2);

	//表示を書き換える
	document.getElementById("timeD").textContent = d;
	document.getElementById("timeH").textContent = h;
	document.getElementById("timeM").textContent = m;
	document.getElementById("timeS").textContent = s;
	document.getElementById("timeMS").textContent = ms;
}

//resetボタンの動作
function resetTime(){
	clearInterval(interval);
	standBy = true;
	timeToAdd = 0;
	elapsedTime = 0;
	displayUpdate();

	//presetボタンを再表示する。配列で得られるため、for文が必要。
	btnsToHidden = document.getElementsByClassName("preset-container");
	for (i = 0; i < btnsToHidden.length; i++) {
		btnsToHidden[i].style.visibility = "visible";
	}
}

//presetボタンの動作
function presetTime(){
	if (elapsedTime < 0) {
		elapsedTime = 0;
	}
	timeToAdd = elapsedTime;
	displayUpdate();
}
function add10d(){
	elapsedTime += (10*24*60*60*1000);
	presetTime();
}
function add1d(){
	elapsedTime += (24*60*60*1000);
	presetTime();
}
function add10h(){
	elapsedTime += (10*60*60*1000);
	presetTime();
}
function add1h(){
	elapsedTime += (60*60*1000);
	presetTime();
}
function add10m(){
	elapsedTime += (10*60*1000);
	presetTime();
}
function add1m(){
	elapsedTime += (60*1000);
	presetTime();
}
function add10s(){
	elapsedTime += (10*1000);
	presetTime();
}
function add1s(){
	elapsedTime += 1000;
	presetTime();
}
function sub10d(){
	elapsedTime -= (10*24*60*60*1000);
	presetTime();
}
function sub1d(){
	elapsedTime -= (24*60*60*1000);
	presetTime();
}
function sub10h(){
	elapsedTime -= (10*60*60*1000);
	presetTime();
}
function sub1h(){
	elapsedTime -= (60*60*1000);
	presetTime();
}
function sub10m(){
	elapsedTime -= (10*60*1000);
	presetTime();
}
function sub1m(){
	elapsedTime -= (60*1000);
	presetTime();
}
function sub10s(){
	elapsedTime -= (10*1000);
	presetTime();
}
function sub1s(){
	elapsedTime -= 1000;
	presetTime();
}
3.CSSで見た目を整える
【9行目】スマホでボタンを連打した時にダブルタップで拡大されてしまうのを防ぐため、 touch-action: manipulation;を追加しました。
【30行目】SVGを背景画像にすると複数出てきて模様のようになりました。 background-repeat: no-repeat;で1つだけにできました。 さらに、background-position: center center;で真ん中に配置できました。
【34-48行目】このCSSをコピペした際は、画像がないためボタンは無地になります。
【68行目】文字は画面に収まる限界まで大きくしたいため単位はvw。 時間を表示する部分(.display-timeと、そのコンテナである.display-container)も 一緒に大きくなるように63、70行目はheight: auto;に。ただ、高さが大きくなり過ぎると 一画面に収まらなくなるため、64、72行目にmax-height: 30vh;としました。 (他の要素と合わせて100vh未満になるようにしてあります)
【71行目】flexbox内の真ん中に配置したい。 横方向はtext-align: center;でOKだが、縦方向はそうはいかない。もう1つ中にflexboxを入れればいけるけど面倒。 そこで、line-height: 1;とすることで解決しました(中身が1行でないと使えない方法です)。
@charset "UTF-8";

body {
	font-family:"游ゴシック体", "YuGothic", "游ゴシック Medium",
	"Yu Gothic Medium", "游ゴシック", "Yu Gothic", sans-serif;
	background-color: #333;
	color:white;
	margin: 0;
	touch-action: manipulation;
}

/* -----------------------------------
プリセットボタン
-------------------------------------*/
.preset-container {
	display: flex;
	justify-content: space-around;
	width: 100vw;
	height: 10vh;
}

.preset-container button {
	width: 100%;
	height: 100%;
	font-size: 24px;
	outline: none;
	border: none;
	appearance: none;
	background-color: #333;
	background-repeat: no-repeat;
	background-position: center center;
}

.add10 {
	background-image: url(images/stopwatch/add10.svg);
}

.add {
	background-image: url(images/stopwatch/add.svg);
}

.sub {
	background-image: url(images/stopwatch/sub.svg);
}

.sub10 {
	background-image: url(images/stopwatch/sub10.svg);
}

/* -----------------------------------
ディスプレイ部分
-------------------------------------*/
#timeMS {
	width: 100vw;
	height: 4vh;
	text-align: right;
}

#display-container {
	display: flex;
	justify-content: space-around;
	width: 100vw;
	height: auto;
	max-height: 30vh;
}

.display-time {
	font-size: 16vw;
	width: 25vw;
	height: auto;
	line-height: 1;
	max-height: 30vh;
	text-align: center;
}

#units-container {
	display: flex;
	justify-content: space-around;
	width: 100vw;
	height: 6vh;
}

.display-unit {
	width: 25vw;
	height: 5vh;
	line-height: 1;
	text-align: right;
}

@media (max-width: 519px) {
	#timeMS, .display-unit {
		font-size: 24px;
	}
}

@media (min-width: 520px) and (max-width: 959px) {
	#timeMS, .display-unit {
		font-size: 32px;
	}
}

@media (min-width: 960px) {
	#timeMS, .display-unit {
		font-size: 48px;
	}
}

/* -----------------------------------
スタート/ストップボタン、リセットボタン
-------------------------------------*/
.start-container {
	display: flex;
	justify-content: space-around;
	width: 100vw;
	height: 20vh;
}

.start-container button {
	width: 40vw;
	margin: 0, 5vw;
	height: 100%;
	color: white;
	font-size: 32px;
	outline: none;
	border: none;
	appearance: none;
}

#resetBtn {
	background-color: rgb(200, 200, 200);
}

#stopwatchBtn {
	background-color:#5E936E;
}

button:hover {
	background-color: rgb(100, 100, 100);
	opacity: 0.8;
}
以上、好きな時間から開始できるストップウォッチの作り方でした。 スマホで時間を計っていて、お昼休憩で別の人に計測係を引き継ぐときに自分のスマホ渡す訳にも... と困ったことがあったので、これを作りました。ぜひブックマークして使ってください。 また、似たようなものを作ることになった方の手掛かりになれば嬉しいです。